How to lay a patio with paving slabs

Home » News » How to pave a patio
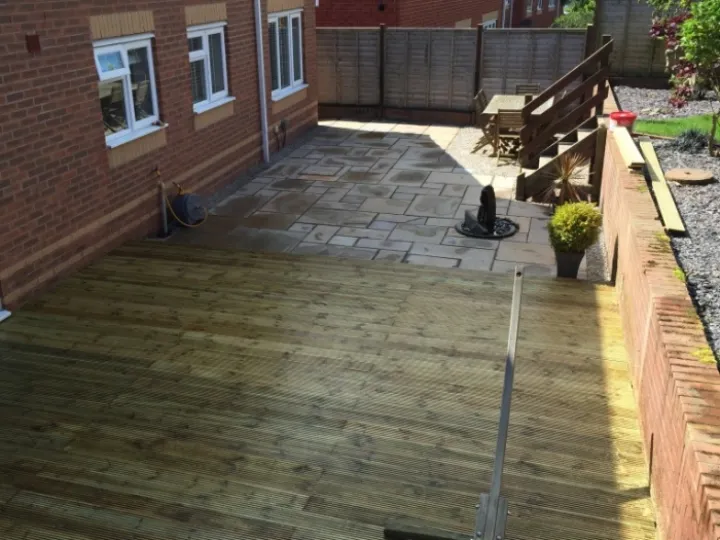
domestic block patio and boards

Laying a patio with slab paving can seem like a simple job but there are lots of traps for the unwary and the inexperienced, and you will want to get this right first time.

A patio is excellent for a low maintenance outdoor space and with the right tools and some basic skills, and you could have a new patio in very little time.

It is better on balance to call in experts like Clark & Kent Contractors who are very experienced in patio design and construction but here are a few basic tips if you prefer laying a paving slab patio yourself.

Designing a patio

Before work begins, draw up a detailed scale design of the proposed patio area. This is best done using graph paper and it will be indispensable in determining not only the number of paving slabs you will need but also the amount of sand and cement to order.

In drawing up your patio design mark any existing features such as drain covers, utility holes and fence boundaries and check their relative levels as they will undoubtedly affect the final patio paving level and could also play havoc with your design layout.

Two primary considerations come into play at this early patio design stage. First, your patio surface must be at least 150mm below any damp proof course on your house wall and second, the patio must slope gradually away from the house to make sure water drains off.

It is best to design a fall of 1 in 60 to ensure proper water run-off. If you can't manage this, then you may have to install a drainage channel to remove any surplus rainwater.

Once your design is drawn up, you can think about what type of material you want and what pattern best fits the space.

Preparing the ground

The next stage in laying a patio with paving slabs is to dig out the area to an approximate depth of 150mm below the proposed surface.

When this is done, mark out the ground to match your paper plan. Use wooden pegs, a builder square, some string and a spirit level.

Peg out the highest and lowest points first, making sure the slope is appropriate, then 'fill in' the gaps with spaced out wooden pegs. These pegs can be used to attach strings that will mark out the appropriate levels as work proceeds.

Next, lay down a good hardcore sub-base layer to a depth of at least 60mm over the whole surface area. This is a stage that is often skimped by amateurs, but it is an essential part of the operation.

The sub-base layer not only disperses all the weight placed on the paving slabs above but also acts as a drainage system, allowing surplus water to soak away from any buildings.

Use a rake to smooth out the hardcore, then employ a wacker plate to compress the aggregate and provide a good solid base.

When the sub base is thoroughly compacted, it's time to lay some slabs. It is useful to 'dry-lay' the paving before using bedding mortar. That way you can make sure any cutting of paving slabs is done beforehand and that when the real laying starts everything will fit neatly and properly.

Laying the paving slabs

The first tip for laying a patio is to make sure to buy all the paving slabs from a single batch as this reduces the possibility of variations in colour and texture.

It can be hugely irritating to finish laying down patio slabs and then realising that some of them a slightly different colour or texture; it can ruin the whole effect of the design.

Each pack of paving slabs should tell you the area it will cover so make sure you have enough for the job by allowing an extra 10% for breakages, cutting and to provide you with a few replacements for the future.

Use a corner of the house to place the first patio paving slab. It is vital that the first paver is positioned correctly so double check that is square, level (with the appropriate slope) and aligned with your string guidelines.

The bedding mortar is usually a mix of six parts sand to one of cement and just wet enough to make it workable. Spread the bedding mortar out to an area slightly larger than the paving and place the slab carefully, keeping it as horizontal as possible,

Gently tap the paving slab with a wooden or rubber mallet to reach the correct level. If you don't have a wooden mallet, then use a block of wood to protect the paving slab against any damage.

Continue with the remaining slabs until they are all laid, regularly checking alignment and levels Leave a gap of 10-15mm between straight edge slabs, a little more 15 -20mm for those with a fettle edge.

Always have a length of wood of the correct thickness on hand to help maintain an even distance between slabs or use appropriate lugs.

Patio paving with a staggered or random design may involve a significant amount of cutting but remember that slabs laid out in a simple 'chessboard' fashion can be very appealing and much easier to place.

Finishing off the patio

Once all the patio paving is laid, leave them to dry for at least 24 hours then make up a weak cement mortar mixture to fill in the gaps between the slabs.

The mortar is usually three to four parts soft sand to one of cement and is mixed relatively dry. Test for the correct wetness by squeezing some in your hand. It should stay smooth and soft — if it crumbles, it is too dry, if water runs out, it is too wet.

Carefully fill the gaps and brush away any surplus with a stiff brush. A useful tip to finish off is to have a bucketful of sharp, gritty sand to hand. Spread it thinly and give the patio a brisk brush to remove any surplus cement from the face of the paving slabs.

In sunny weather, it's a good idea to cover the area with tarpaulin or sacking to prevent the mortar drying out too quickly. In winter it will need protection from rain and frost for at least 24 hours.

A well-laid patio should be relatively easy to maintain. A sweep with a stiff brush should be all that is needed. Take care if using a weather sealant as this can sometimes alter the colour and always use the pressure washers at a low setting.

Patio laying points to remember

  • Measure out carefully and order enough paving for the job
  • Dry lay the patio first to make sure everything fits
  • Create a solid compacted sub-base to the correct depth
  • Lay the first patio paving slab from a corner and work outwards
  • Check the paving levels and fall often so that you don't stray off track
  • Wait at least 24 hours before stepping on the patio paving

Clark & Kent Contractors are experts at laying patios. Call us now on 01630 672329

COMPANY NEWS

JCB Roller 18120
Road roller hire | Tips & advice
Clark & Kent
Driveway and garage
Driveway and patio drainage
Clark & Kent
Surfacing block patio paving
Hiring a driveway contractor
Clark & Kent
Woodcutter forest work chainsaw composite set
Using a chainsaw safely
Clark & Kent
Construction workers  in front of pile driver machine
Groundwork is the bedrock
Clark & Kent
Digger demolishes building in site clearance operation
Site clearance basics
Clark & Kent
CK Advert plant tool hire